JA2 Walkthrough - Meduna
N3 Meduna – Airport
Facts:
- Sector: N3
- Terrain: Tropics (City)
- Key building: Airport
- Civilians: No
- Militia: Yes
- Levels: 1
Map explanation:
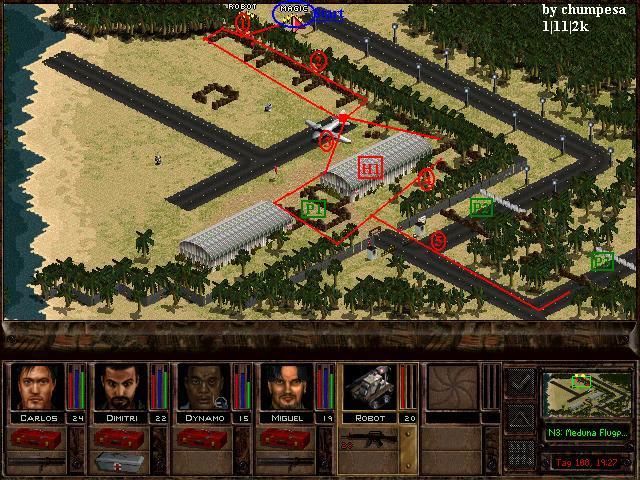
- Start: Deploy your mercenaries here.
- 1: Once they are in cover, have two cut a hole in the fence to surprise the positions from behind, while the rest of the squad deals with the enemies along the fence.
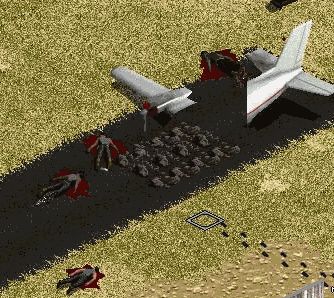
- 2: Fight through the eastern positions with both squads and regroup behind the airplane. Watch out for enemies in the central position, as they are equipped with a mortar.
- 3: Split your squad again. One part sneaks around the right side of the house to check the eastern positions. The other part moves past the house together and destroys tank P1.
- 4: Sneak along the very edge of house H1 to eliminate the southeastern positions. If you can't advance, use grenades or bring out the mortar.
- 5: Only two tanks remain to be destroyed, located at P2 and P3. Enemies are now only scattered.
This is arguably the most important Meduna sector, since weapons and ammunition from Bobby Ray's can be flown in here. Long-range weapons are the best choice, and the squad is usually already equipped with rocket rifles. LAWs, mortars, and grenades are essential.
To conquer Meduna without pause, it is recommended to bring along a mule squad, ideally consisting of the basement mercs Dimitri, Ira, Miguel, and Carlos. This squad carries tools, ammunition, grenades, and LAWs to ensure enough supplies for the main squad. The mule squad should always remain at its protected starting point, distributing weapons only at the end.
Enter the sector from the north and immediately move your mercenaries into cover, otherwise they will be easy targets for soldiers entrenched behind sandbags. Enemies hiding behind trees are best dealt with using a mortar.
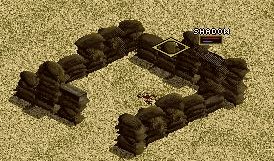
With two mercenaries, cut a hole in the fence and sneak behind the sandbag barricades to kill enemies from the rear, while the others handle those along the fence. The enemies entrenched behind the central sandbags are best eliminated by sneaking up with an experienced merc and standing up to gain an interrupt. Alternatively, they can be safely taken out with a mortar from a distance. Regroup behind the airplane.
Advance to house H1 and take cover there. Split the squad again: one part goes to the right side of the house to check the remaining sandbag defenses. Against heavily armored elite soldiers, it's best to fire once and then retreat safely behind the house, using the so-called hit-and-hide technique [© by chumpesa ;)].
The other part of the squad equips a LAW and destroys tank P1. Always destroy tanks in a single turn! If one LAW isn't enough, load HEPB rockets into your rocket rifle and fire at it. Tanks can cause heavy damage to buildings and may even destroy crates filled with valuable items.
Afterwards, eliminate the guards at the guardhouses. Tank P2 should be no problem if you proceed as described. Another tank is located at P3, with a soldier hiding behind the sandbag barricade. In the crates inside house H1 you'll find LAWs and grenades, and in the left-hand house additional useful equipment.
[ © by chumpesa || special thanks to stalfensteinstiftung® ]
N4 Meduna – SAM Site
Facts:
- Sector: N4
- Terrain: Tropics (City)
- Key building: SAM Site
- Civilians: No
- Militia: Yes
- Levels: 1
Map Explanation
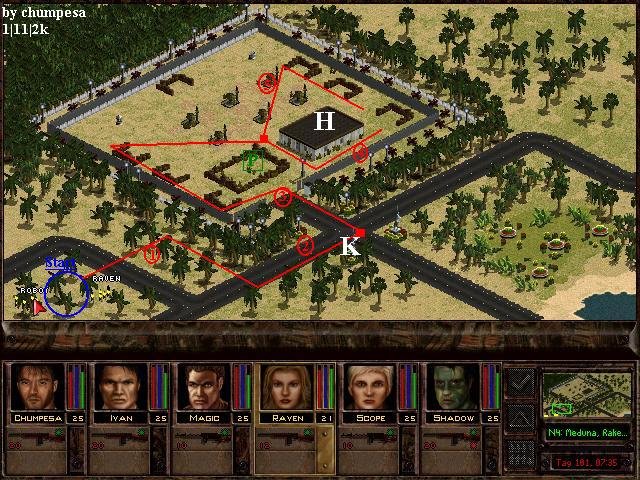
- Start: Deploy your mercenaries here.
- 1: The first enemies are hiding in the palm grove above your position.
- 2: Advance to crossroads K and take cover. From here you can destroy the tanks at P with a mortar.
- 3: Sneak to the eastern defenses and eliminate the enemies behind the sandbags with grenades, or surprise them with an experienced mercenary. Then move behind house H and split your squad.
- 4: One part sneaks around the right side of the house to take out the southeastern defenses, or attacks the specialists from the roof.
- 5: The other part fights through the rockets to the northeastern defenses and clears them out.
- K: The crossroads where you take position to destroy the tanks.
- H: This house contains five very difficult-to-open crates with LAWs, mortars, and raw meat (yes, really).
Strategy
Capturing this sector gives you complete air superiority over Arulco. House H contains useful items, but the crates are heavily locked and trapped—only a merc with high technical skill and lockpicking ability (like Magic) can open them.
The most dangerous enemies are those entrenched behind sandbag barriers. Two tanks guard the entrance, so mortars and LAWs are essential.
Deploy your mercs at the lower left. Clear the palm grove above—those enemies are not a major threat. Then move to crossroads K and take cover. Destroy the two tanks at P with mortars from this safe position.
Advance lying down past the guardhouses. Eliminate the sandbag defenses by throwing grenades or sneaking under cover of smoke. Alternatively, crawl behind the barriers and stand up to gain interrupts. Repeat this for all western sandbag defenses.
Split your squad:
- One group hides behind the house and attacks the lower eastern defenses, or climbs onto the roof to fire down. If enemies constantly gain interrupts, use mortars or mustard gas grenades to clear them.
- The other group fights through the rockets to the northeastern defenses. If specialists keep interrupting, switch to long-range weapons.

Keys dropped by some enemies unlock the door to house H. Inside are five crates, all rigged with electrical traps. Only mercs with high technical skill and lockpicking ability can safely open and disarm them.
[ © by chumpesa || special thanks to stalfensteinstiftung® ]
N5 Meduna – Arena
Facts:
- Sector: N5
- Terrain: Tropics (City)
- Key building: Arena
- Civilians: No
- Militia: Yes
- Levels: 1
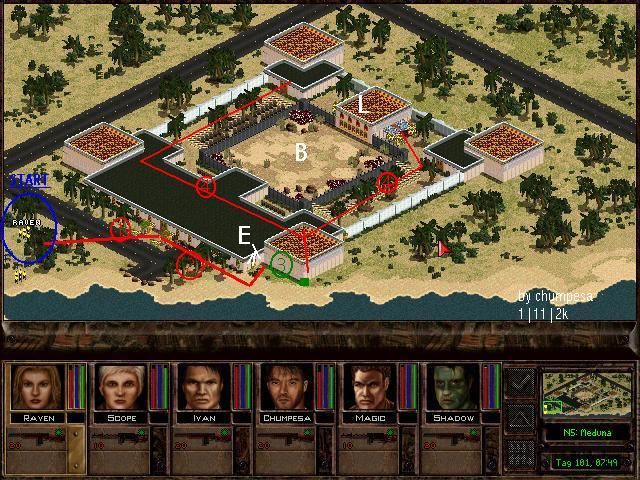
Map Explanation
- Start: Deploy your squad here.
- 1: Move to the door and open it.
- 2: Alert the enemies and take cover in corner E.
- 3: Blast a hole in the tower and kill the enemies rushing out.
- 4: Split your squad to search the rest of the arena for enemies, then break into Deidranna's box L to collect LAWs.
- E: Corner where you take cover.
- B: Initial location of the Bloodcats.
- L: Deidranna's box. The doors are locked, but inside you'll find LAWs and MP3s.
Strategy
This is one of the most entertaining and unique sectors in the game.
Inside Deidranna's arena you'll face both soldiers and Bloodcats. The Bloodcats only attack you, not the enemy troops. Burst-fire weapons (with AP ammo) are essential here.
Enter from the left side of the sector. Quickly open the door and move to corner E without engaging enemies. Position your mercs optimally. To lure enemies, shoot out the windows or fire at one soldier, then retreat back to cover.
From the left side, a stream of Bloodcats will charge. Use burst fire to cut them down quickly. Some soldiers will also appear, but from this position you should gain interrupts.
Once no more cats or soldiers arrive, blast a hole in the tower. Throw mustard gas and tear gas grenades inside. The remaining enemies will attempt to reach you through the hole, but weakened by the gas, they'll be easy to finish off.

O3 Meduna – Park
Facts:
- Sector: O3
- Terrain: Tropics (City)
- Key building: Labyrinth
- Civilians: No
- Militia: Yes
- Levels: 2
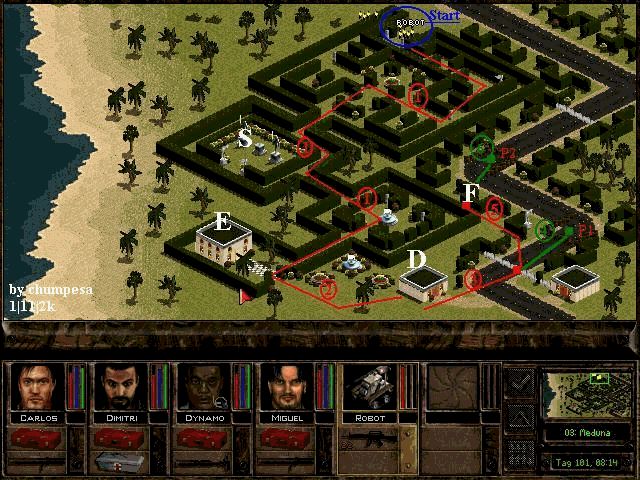
Map explanation:
Start: Deploy your mercenaries here.
1: Sweep the labyrinth and search it for enemies.
2: From the exit, advance to house D and take cover there.
3: From there, blow up the wire barriers and move to tank P1.
4: Destroy the tank with a LAW.
5: Then sneak behind the hedges to F.
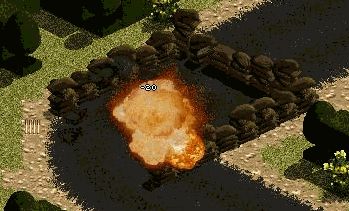
6: Destroy tank P2 with a mortar.
S: Use the remote here to open the secret shaft.
E: You'll find the remote in this house.
D: Take position behind this house to destroy tank P1.
F: Hide here and destroy tank P2 with a mortar.
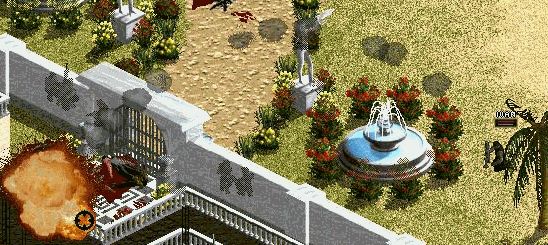
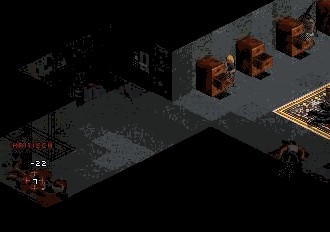
This is a very intense and interesting sector—Deidranna's private garden. Knives are practical here, since you often get interrupts in the narrow labyrinth corridors and a knife can be very effective.
In the screenshot above, you can see I always bring a "mule" squad carrying LAWs, mortars, tools, and ammunition to supply my main squad.
Deploy your mercenaries at the top and take cover behind a hedge. Then sweep the labyrinth; there aren't many enemies inside, the key is to secure interrupts.
From the labyrinth exit, move behind house D. Blow up the barbed wire barriers and then destroy tank P1. Next, hide behind the hedges at F. You can destroy the tank with either a mortar or a LAW, though the LAW is risky because two soldiers hide near the tank and can easily punish your exposed merc.
After this position, only a few soldiers remain, mostly along the road—assuming you didn't miss anyone in the labyrinth.
In house E, you'll find a remote in a locked cabinet.
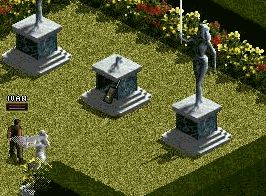
Take it to the statues marked S in the labyrinth and use the remote. A secret shaft opens at the middle statue, leading through an underground tunnel directly to Deidranna's bunker.
O4 Meduna – City
Facts:
- Sector: O4
- Terrain: Tropics (City)
- Key building: Café
- Civilians: Yes
- Militia: Yes
- Levels: 1
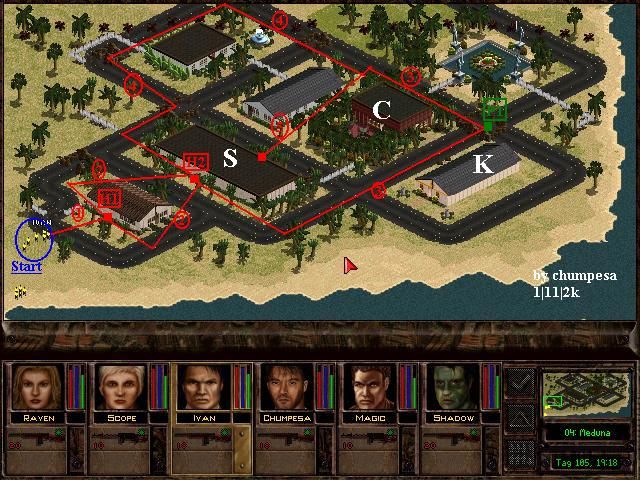
Map Explanation
- Start: Deploy your mercenaries here.
- 1: Advance to house H1 and take cover to eliminate nearby defenses.
- 2: Split your squad and regroup behind house H2.
- 3: One group clears the eastern defenses—watch out for the tank at P1.
- 4: The other group fights through the western side of the sector and meets up with the first group.
- 5: Once reunited, move back to house H2, where the last soldiers are hiding. Either blast a hole in the house or try to gain an interrupt with an experienced merc when opening the door.
- S: This house contains 3 well-protected specialists.
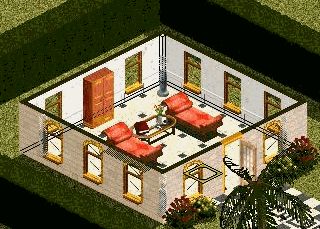
- C: The café of Meduna. The owner is occasionally present but has no significance.
- K: Behind locked doors in this house you'll find $10,000 in a cabinet.
Strategy This sector is the center of Meduna. Besides the café, you'll find wealthy houses—one hides $10,000, another contains six units of Compound-18. Strongly fortified positions make this fight tough, so mortars and tear gas grenades are ideal. Sniper rifles are also useful, and a LAW is required for the tank.
Deploy your mercs at the bottom of the map. Move to H1 and take cover. From here, you can deal with western defenses. Sneak in prone or disable soldiers behind sandbags with tear gas grenades.
Advance to H2 and split your squad. One group clears western defenses, the other handles the east. Destroy the tank at P1 with a LAW.
After eliminating all sandbag defenses, three enemies remain inside H2.
These are difficult to hit, protected behind windows. You can sneak along the house edge and gain an interrupt when standing up, or blast through the rear wall.
Once the sector is secure, search the houses. In the building left of the café (a medical practice), you'll find six units of Compound-18 in the back room—useful for upgrading armor.
In house K, you'll find $10,000 in a cabinet. Taking it does not reduce loyalty. In the medical station left of the café, you'll also find six units of Compound-18.
P3 Meduna – Palace
Facts: Sector: P3 Terrain: Tropics (City) Key building: Palace Civilians: yes Militia: yes Levels: 2
Map explanation:
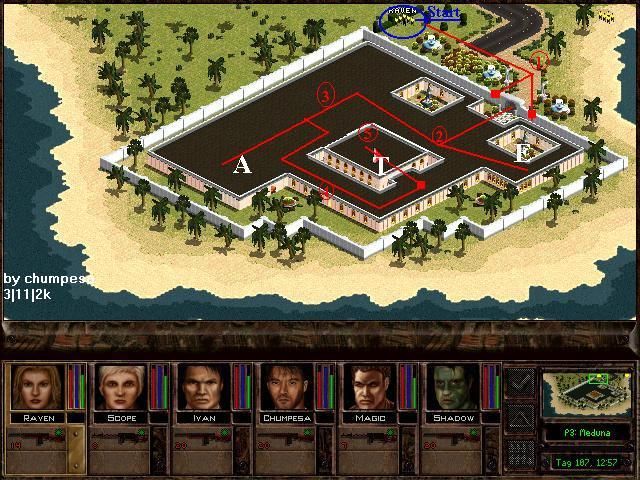
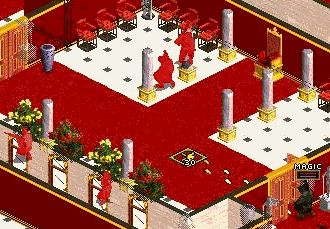
Start: Deploy your mercenaries here. 1: Eliminate the enemy outside the palace, then take cover at the two points. Kill the enemies in the courtyard with the mortar and with individual interrupts, but keep returning to cover. 2: Blow the gate and storm into the palace, then check the antechambers. 3: Next, clear the western wing. Search every room for enemies. 4: Advance to the throne room T and take position in front of it. 5: To storm the throne room, it's best to smoke the entrance with smoke grenades, and after wounding an enemy, immediately pull back to repeat the process next turn. A: The chimney leads to Deidranna's bunker. E: In one of these courtyards you'll find the wounded Elliot. T: This is the heavily guarded throne room.
Here it is: Deidranna's magnificent palace. It's packed with soldiers, making it a tough fight at the end of the game. You'll also encounter Elliot here, who—despite being shot—still remains on good terms with Deidranna.
Deploy your squad at the north of the map; you should be well equipped with mortars and LAWs! Only one enemy is outside the walls. Then take up the positions as described. The only way into the palace is to blow the gate—the palace walls can withstand a LAW.
Always try to sneak an experienced merc to the gate and, on an interrupt, drop one of the many enemies with a headshot burst.
Around 10 enemies will gather in this courtyard and make life difficult. If you blow the gate, they'll rush out and often get the first interrupt. To avoid this, keep the gate closed at first and blanket the courtyard with mortar fire.
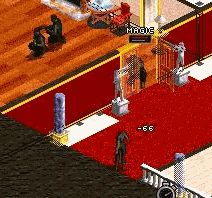
If any survive, they'll retreat. Then blow the gate to open the way into the palace. Move into the entrance hall and split your squad to check both side wings. You'll also meet Elliot and see Deidranna's various rooms. Once the palace is clear, only the central throne room remains. It's also packed with enemies—especially dangerous are those hiding behind the planters. Use hit-and-hide tactics, smoke the entrance, and flood the throne room with mustard gas; alternatively, blow a hole in one of the walls and enter from there.
After killing the last enemy, you'll realize Deidranna isn't in the palace. Searching won't help—she's hiding in her bunker.
You can reach it through the chimney in her living room or via the connecting tunnel in O3.
[ ©by chumpesa ||special thx to stalfensteinstiftung® ]
P3-1 Meduna – Bunker
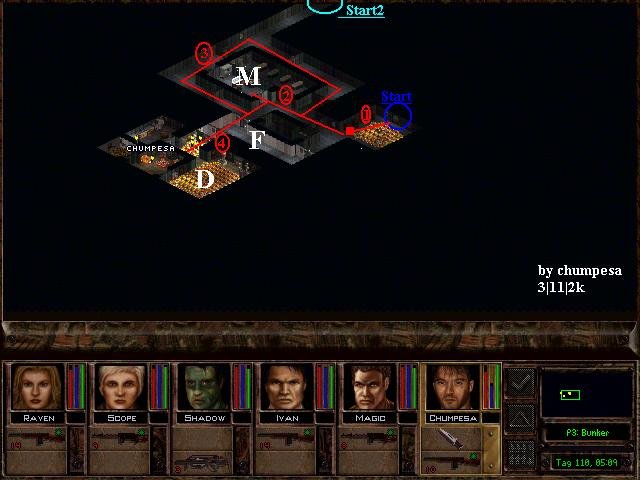
In this hidden bunker Deidranna is located. It is heavily guarded by specialists, and you will also encounter Joe, her bodyguard. In one cabinet you can find a prototype of what is arguably the best weapon in Jagged Alliance 2: the auto-rocket rifle, which can fire its entire magazine at once—essentially a burst-fire rocket launcher. As in all underground areas, burst-fire weapons are highly recommended.
There are two possible entry points:
- Through the connecting tunnel from O3, accessed by opening the statues.
- Through the chimney in Deidranna's palace.
Since this bunker is part of the palace, the chimney exit is considered the starting point. You will immediately encounter Deidranna's bodyguard upon entering.
Take him out quickly and move into cover, because many enemies will pour out of the southern door.
Next, fight through the northwestern section of the bunker. In room M, an enemy often gains the interrupt if you open the door. Use smoke grenades to obscure the entrance, or send in your most experienced mercenary.
Inside this room is a switch that controls minefield F. Disable it if possible, then advance across the (hopefully deactivated) minefield into Deidranna's living quarters.
Here you'll find a cabinet containing the auto-rocket rifle, which you can immediately use against Deidranna herself.
She hides in one of the rooms. Even against an experienced level 10 mercenary she can gain interrupts—she fights well and is fully armored.
Therefore, throw a tear gas grenade into her location, equip gas masks, and then confront her.
Talking is useless—draw the auto-rocket rifle and end her reign decisively.

Congratulations, Arulco is free!
© by chumpesa || special thanks to stalfensteinstiftung