JA2 Walkthrough - D2 Chitzena SAM Site¶
Split your mercenaries into two squads on the map screen. Squad 1 marches to the sector north of the SAM site (C2), while Squad 2 moves to the sector to the east (D3). After a good nap, wait until nightfall. Now, give both squads the order to march to D2. When the message "Enemies found, coordinate simultaneous arrival?" appears, answer "Yes." Squad 1 enters the scene at the western edge of the map (roughly level with the barracks); Squad 2 is dropped off near the center of the sector (a short distance north of the road). From here, the squad should sneak between the tall grass—be sure to watch out for the searchlight beams, as it gets a bit tight.
While Squad 2 "perforates" the gate guards, Squad 1 cuts a hole in the fence, enters the compound, and splits up. Half head south, the other half head west to clear the area. Once Squad 2 has finished off the guards at the entrance, they also split up. One group heads toward the barracks, cuts a hole in the fence, and climbs onto the roof; the others head toward the control room, cut a hole in the fence, and also climb onto the roof. Both parts of Squad 2 must move quickly and cautiously, as standing briefly in the lamplight is unavoidable. From the rooftops, they then provide cover for their colleagues in Squad 1 as they sweep the grounds.
Sometimes a soldier—or even Mike—is still entrenched in the control room or the barracks. In that case, follow standard procedure according to § 563 AIMRR (A.I.M. Rules and Regulations) regarding building entry: toss a smoke grenade through the door, wait a moment, and then storm in.
Solution by Marco "DarkMagic" Torkler:
The best approach is to grab a pair of wire cutters and attack from sector E2 upwards. Drop 3–4 mercenaries (preferably your best marksmen) in the water just before the small island, and the others on the mainland.
The mercenary with the wire cutters should sneak up to the fence in Stealth Mode (SM) and try to be the first onto the roof of the command center undetected. Once there, they can rest and wait in a prone position.
Meanwhile, the mercenaries dropped in the water move onto the small island and take up positions; everyone should have camo paint if possible. Of course, it is sufficient if one person has 100% camouflage, as they can hide behind the small bush on the island.
By now, the first enemies should be visible. If everything was done correctly, you will see the enemies, but they won't see you. Now the merc on the roof and the others come into play. The mercenary on the roof crawls in SM as far as possible to the edge, but not so far that they can be spotted.
The other mercenaries follow slowly, also in SM, while the mercs on the island keep everything in sight to ensure the soldiers on the mainland aren't suddenly surprised by an enemy—because everything happening in front of the first building is being watched by them! Depending on how many mercs you brought, have 2–3 walk around the right side of the command center. They might encounter an enemy there, but only "maybe," as they might not yet see the enemy standing by the small guard shack. Don't be reckless!
Once the mercs who sneaked around the right side are in position, another 2–3 sneak around the left side of the building. BUT BE CAREFUL! Only crawl past the windows, or you will be interrupted. Once all mercs have sneaked past the windows, rise to a crouch and wait—all in SM, of course!
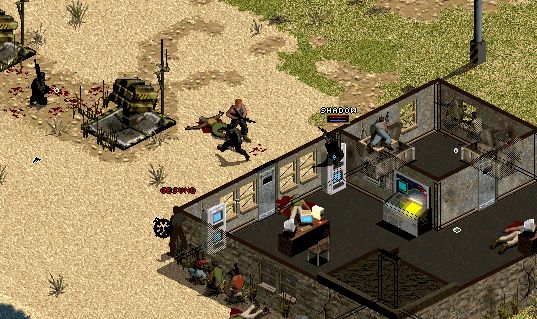
Now the mercenaries on the small island can open fire! The merc on the roof stands up and can pick off the charging enemies. See Shadow in the image above, who just sent an enemy "across the Jordan" with a chest splatter!
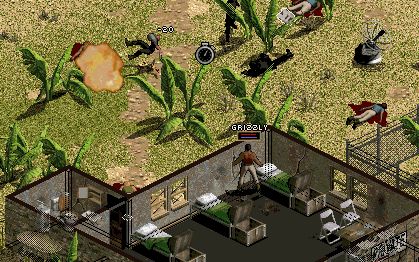
Once all enemies in and around the house are eliminated, it's time for the cleanup, as about 4–5 more enemies are waiting. This includes the one boldly hiding behind the guard shack.
As you can see, these enemies don't pose a particularly large problem.
Now that the SAM site has been captured, you should take one or, even better, two good instructors and train militia as quickly as possible. Once Deidranna finds out, she will immediately send more of her troops! Scully and/or Raider are excellent choices for instructors.