JA2 - JA2 Demo
Part 1: The Factory
Do you really think you're tough enough for this game?
YEEEEESSSSS!??! – Then show what you've got in Demoville!
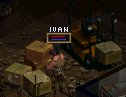
First, we head with our squad to the workshop. There we find a day‑vision device, often mistakenly called Sun Goggles by the civilian wimps, which Ivan immediately grabs and puts on… COOL! But we're not on vacation here, so move along, soldier! In the small annex we also find some TNT for Ivan, and we generously distribute the stuff from the crates among our men.
Then it's off to Jack, the junk dealer. Since we want all his stuff but hardly have enough money for it, we use our ruthless (!) bargaining skills to drive the price down to… let's say… zero (GRIN!). He'll probably never rip off another squad of AIM mercenaries after we elegantly take him out.
But remember: Don't make any noise! The enemy soldiers shouldn't immediately know that today a small squad of A.I.M. elite mercenaries is dropping by to say hello (just wait and see…).
So either use your fists, or first buy the appropriate tools from Jack (silencer, knife, machete, knuckle‑duster…) and then take him out with them… (GRIN! GNA!)
We share Jack's leftovers among our mercenaries (at no cost!). The best piece, the Remington, naturally goes to Ivan. Vicki screws the silencers onto her barrels, and we distribute the rest as we see fit, then position our squad in front of the factory guardhouse. Ivan and Shadow take position at the rolling gate, Vicki stands at the small door next to it, and the rest remain in the background.
Now it begins! You can almost smell the enemies' cold sweat… Vicki opens the right‑hand door, and on "hard" difficulty she's already staring into the bewildered face of the first victim… uh, enemy. But after four well‑aimed shots from Vicki's trusty gun, he should quickly give up the ghost.
On "easy" or "medium," you also open the door to the left room, and the first bullets hit the enemy there. If the opponent is still standing, Ivan opens the rolling gate and finishes him off with a knife. The guardhouse is ours!!!
So far the alarm should not have been triggered, and to keep it that way we obviously do NOT PRESS THE RED BUTTON (seriously, don't…!!)

We distribute the contents of the crates among our mercenaries again, paying special attention to Vicki, since as the third‑best markswoman she finally needs a proper weapon (preferably two…). The grenades go to Ivan and Shadow.
And on we go. We place Ivan and Shadow once more in front of the rolling gate, and let Vicki open the right‑hand door. First we open the door and send a few friendly projectiles toward the bewildered enemies. After that, we open the rolling gate.
Ivan takes cover behind the crates and provides covering fire for the others, who begin positioning themselves along the wall of the main building (but of course only once all the enemies there are gone).
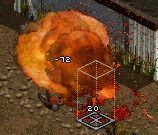
If an enemy is standing too close to the tanks on the left side of the main building… BOOOOMMMM! A few well‑aimed shots at him, and there won't be much left of the tank (or the enemy, or the wall…).
Then we bring Ivan forward and position him and Shadow on both sides of the door. If the door is already open, be sure to take the longer route over the roof; otherwise the enemy will definitely get an interruption.
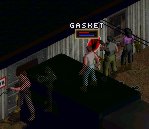
Vicki and Dr. Q secure the two corners of the main building, just in case one of the "clever" enemies gets the idea to sneak up behind our mercenary squad. And Gasket… well, he's picking his nose again — not much else he's good for anyway.

It's important that the mercenaries keep looking toward where the next enemy is expected (that means toward the door or the corner of the building).
This way, the interruption is guaranteed! If the enemies don't voluntarily storm out of the door (to their death), we first draw attention to ourselves with a few shots. When the first one sticks his head through the door, we blow it off with a well‑aimed shot… and the second… and the third… ;).
Once we've taken out most of them around the corner, we storm the main building. But not through the small door — instead through the door with the little anteroom on the right, since here we can take cover much better. The rule here: shoot at everything that looks explosive — BOOOOMMMM!! (bombs, poison gas, tanks…).
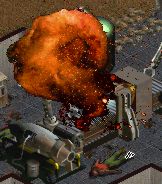
BOOOOMMMM!! … CRASHHH!! … HISS!! … Soon there won't be much left of the building or the enemies.
But watch out: behind the house there are usually more enemies, and if you blow up the back wall you'll make yourself an easy target. So keep that wall intact — then you can use the windows perfectly as cover (lie underneath, then quickly sit up and shoot…).
Once the enemies behind the house are shaking hands with Jesus, we turn to the last opponent on the roof of the small hut to the north. We place Vicki behind the crates next to the left rolling gate and distract the bad guy with a few well‑aimed shots.
Meanwhile, we send Ivan and Shadow toward the fence gap in the east, climb over it, and circle around the fence to the gap in the far north, right next to the small hut. While Vicki continues to distract the enemy, Ivan and Shadow — crouched and in stealth mode — climb over the fence and quietly advance toward the hut.
Once underneath the hut, we let them rest for a moment and regain their strength. Then we strike! With one more distraction shot from Vicki, Ivan and Shadow climb onto the roof and take down the enemy with one or two well‑aimed shots at close range. That should be the last one. THE FACTORY IS OURS!!
His rifle and the contents of the crates are distributed among our mercenaries, with Ivan and Shadow naturally getting the best gear. Then comes Vicki, and whatever remains is shared among the rest. Once that's done, we gather our squad in front of the stairs, take a deep breath, and descend into the CELLAR…
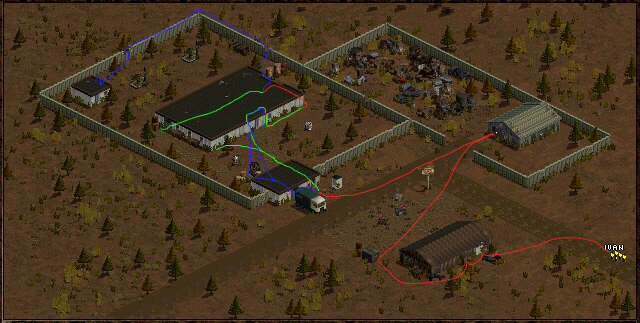
RED = everyone
BLUE = Ivan and Shadow
GREEN = Vicki, Dr. Q/Fox, and Gasket/Bubba
Part 2: The Cellar
Hmmmmm… this already looks quite inviting down here…
No matter, we have a job to do! So we position our squad next to the door of the first room. Ivan, Shadow, and Vicki should stand directly beside the door, while Dr. Q and Gasket stay a little further back.
Important: Our squad must look directly at the door! This way, the interruption is guaranteed.
If the enemies don't stick their heads through the door on their own, we make ourselves noticed again with a few shots.
As soon as a nose peeks through the door… you can probably imagine the tasty rest yourself. Soon enough, several enemies should be taken out, and we can move on to the first room once the opposition has pulled back. The small room should be secured quickly.
Next, we need to bring the eastern and western corridors under our control, since the main room is difficult to take from here. So, first clear the western corridor with Ivan and Shadow (watch out, enemies lurk in the niches… best to toss in a grenade — if someone screams, you've hit them…) while the others secure the small room.
If successful, Ivan and Shadow move into the eastern corridor, while Vicki and Dr. Q are sent into the western corridor to secure it, and Gasket stays in the small room by the door to hold it. Once the eastern corridor is "liberated," we can tackle the main room.
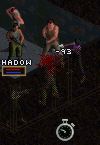
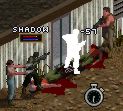
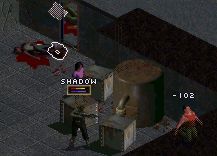
Shadow in action: We attack from both sides (Ivan and Shadow from the east, Vicki and Dr. Q from the west). The rule here is again: "peek in, shoot, get back into cover."
When we finally have the room under our control, we regroup and deal with the last enemy in the southern office. Here we must be especially careful, since he's in a very strong position and almost always gets an interruption! Once he's finally dead, the cellar is ours!
If you didn't choose "sci‑fi mode" at the beginning, you're finished now — you can head up to Gabby and watch the ending sequence.
Otherwise, there are still a few bugs to wipe out in the secret level (no… this has nothing to do with Microsoft…). So, grab all the ammo and weapons you can find, persuade Dynamo to come along (works best with Ivan, Shadow, or Vicki — just try a few times), get the key from the computer console in the main room, and use it to unlock the drawers of the desk in the last office.
Inside you'll find a remote control, which you then use in the room with the corpses. SCHWUPPPP… as if by magic, a secret door opens, leading to a spooky hole. Off we go — straight into the secret level…
Part 3: Secret Level
There's really not much to say about the secret level. Best strategy: just fire away with everything you've got and let the barrels roar. Line up your squad in two rows and wait for the bugs to come… and then PENG! PENG! BOOOM!! RATATATATATATA!! SPLASH!!!
The L.A.W. works best here, along with anything that makes a big bang… and always fire in burst mode. Also, don't chase the bugs — wait until they come to you, and then…
If you still haven't had enough, you can simply go back down into the cellar and re‑enter the secret level… and all those sweet bugs will be back again. Otherwise, head up to Gabby and the mission is over… until we finally get our hands on the full version!!

Text von Barlmoro / pics von Barlmoro
Barlmoro Barlmoro@JaggedAlliance2.de